Error has occurred!
- KB577
- Jun 20, 2024 02:30 PM
How do I Add Typed Signatures to Documents?
You can use the Digital Signature Certificates and Signatures and Initials features to add typed signatures to documents, as detailed below.
Use a Typed Signature for Digital Signatures
Please note that a valid digital signature certificate is required to use these features. If you don't have a digital signature certificate, you can obtain one here, or create one here.
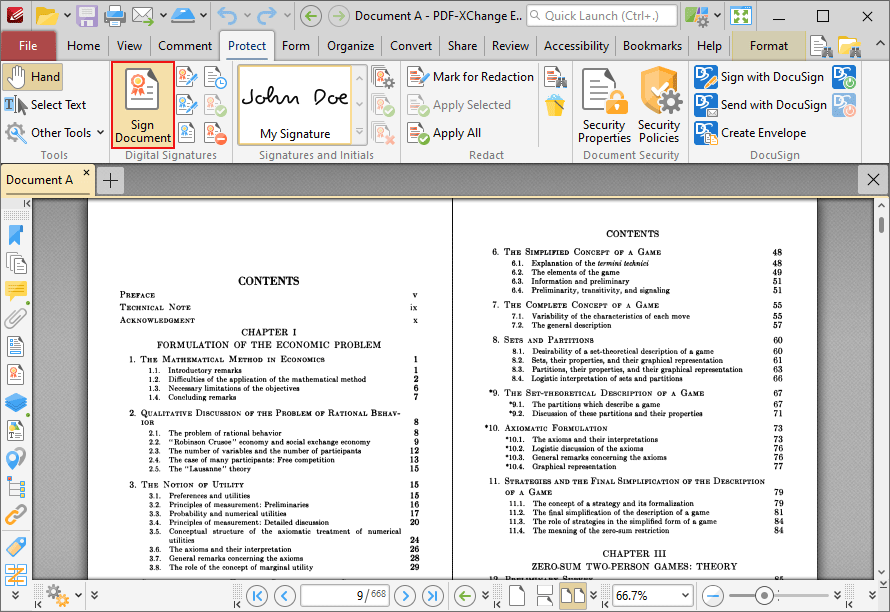
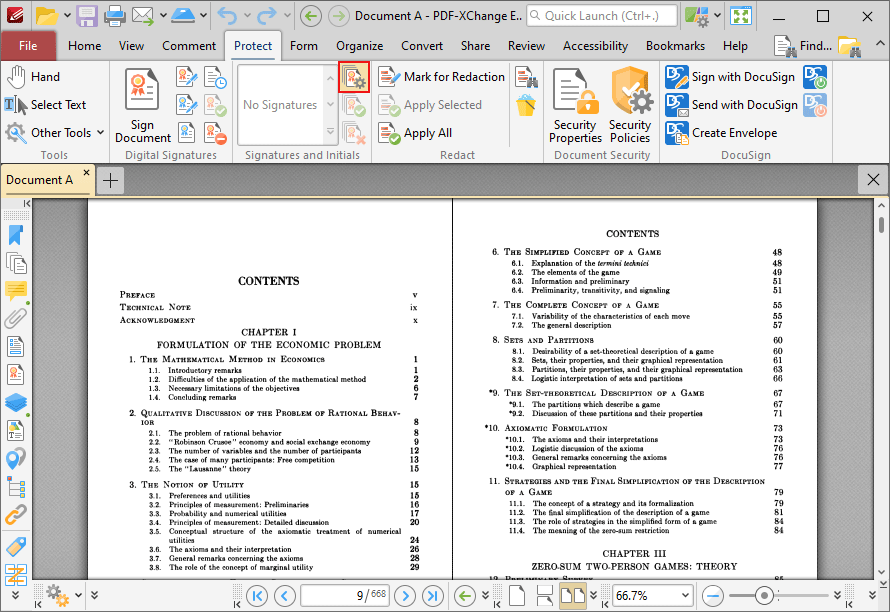
1. Click the Protect tab, then click Sign Document:
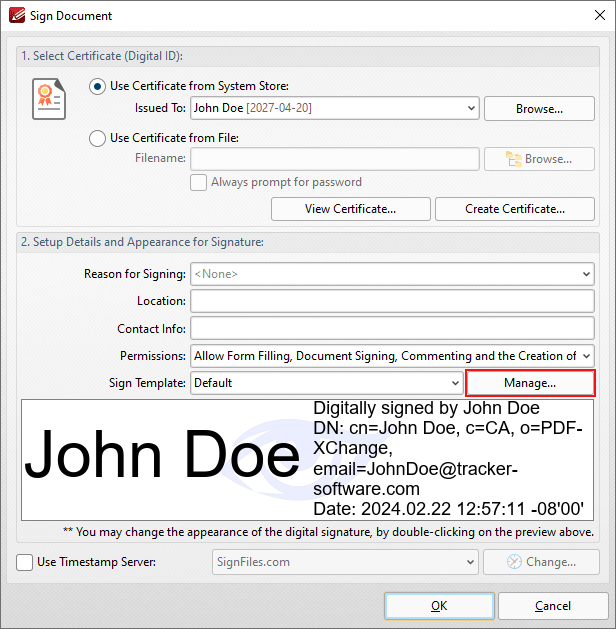
If there is a signature field in the document, then the Sign Document dialog box will open, as detailed below. If there is no signature field in the document, then the cursor will update to a signature field that you can move to the desired location and then click to add it to the document. The Sign Document dialog box will open. Click Manage to edit the template used for the signature:
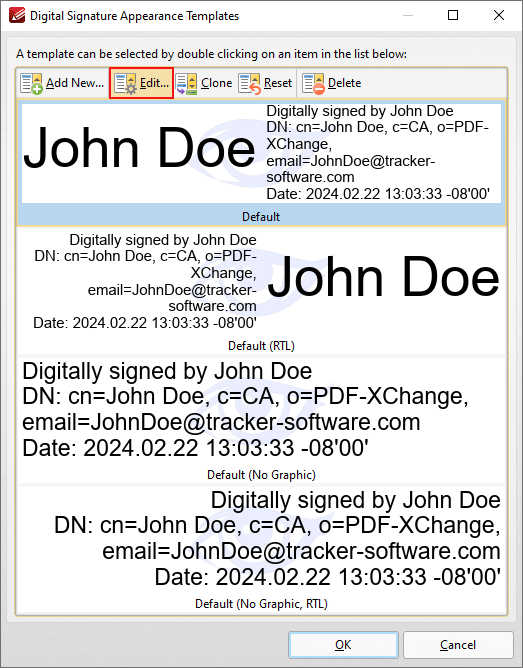
The Digital Signature Appearance Templates dialog box will open. Select the template you want to edit and click Edit:
The Edit Template of Digital Sign dialog box will open. Click the Icon dropdown menu and select Custom, then select Type Signature:
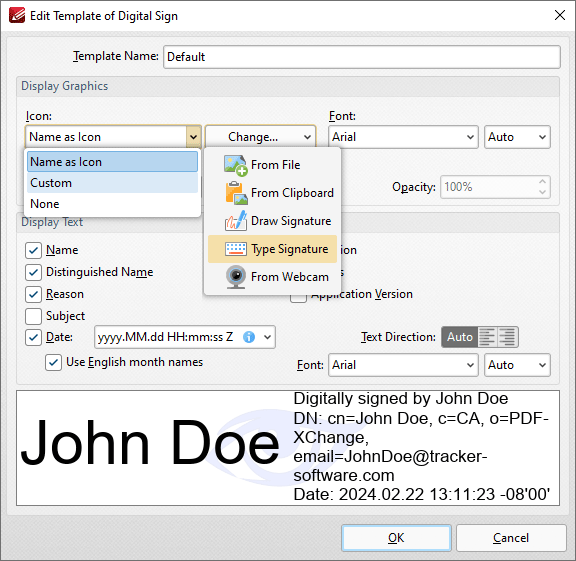
The Type Signature dialog box will open. Enter the name/signature you want to use, then click OK in the open dialog boxes. The typed signature will then be used when you sign the document:
Use a Typed Signature for Physical Signatures or Initials
You can also use a typed signature for a physical signature or initials in PDF-XChange Editor:
1. Click the Protect tab, then click Manage:
The Manage Signatures and Initials dialog box will open. Click Add, then click Type Signature. The Type Signature dialog box will open:
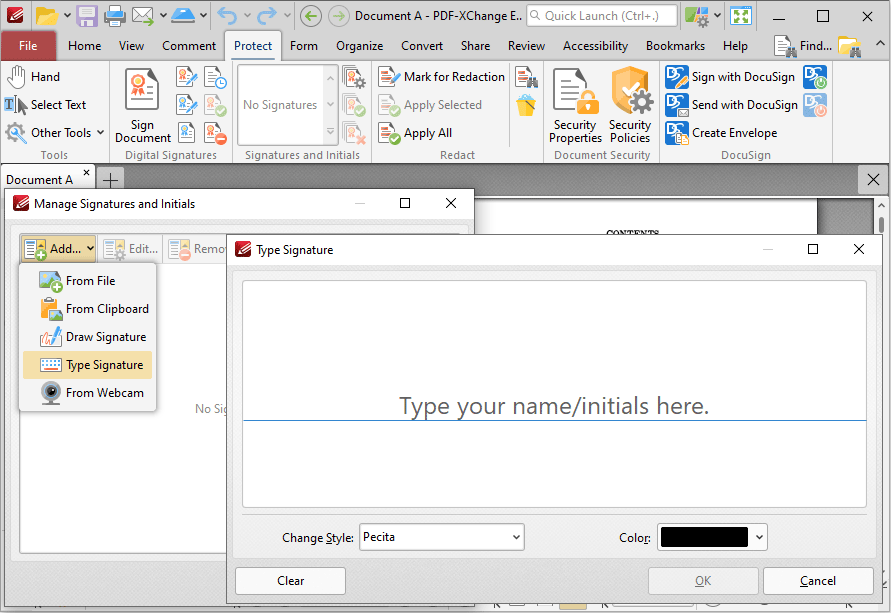
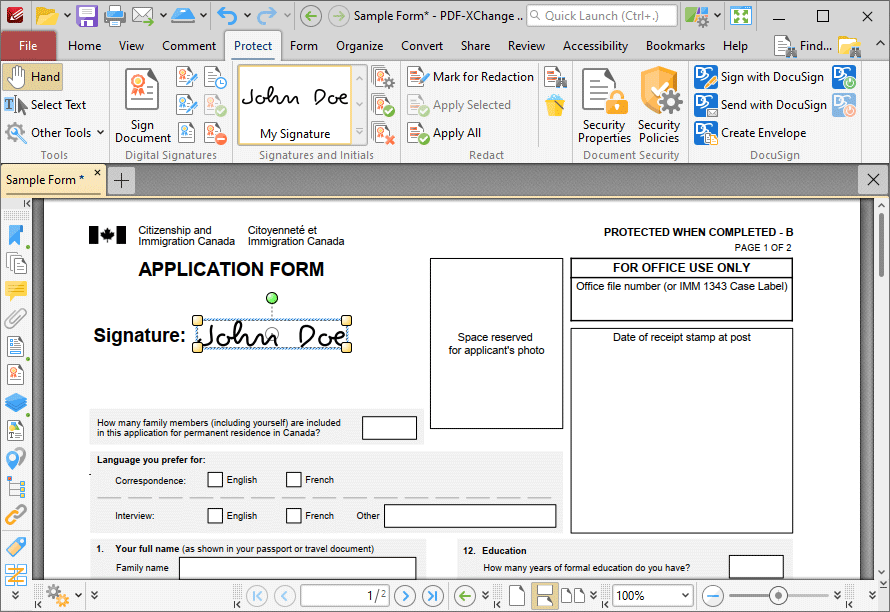
Enter the desired signature and click OK to save it. You can then click it in the UI to enable it and add it to documents:
Please note that these physical signatures/initials do not authenticate documents or offer the same levels of security as digital signatures, and should not be used in their place.
Adding New Fonts for Use in Typed Signatures
Pecita is the only font available by default when typed signatures are used. If you want to add new fonts then place copy of the font file (in *.ttf or *.otf format) in the following folder:
C:\Program Files\Common Files\Tracker Software\Common\SignatureFonts
If this folder is not present then go to C:\Program Files\Common Files\Tracker Software\Common and create a folder called "SignatureFonts" (case sensitive) and add font files there.
Note that common Windows fonts are available on your PC in the folder C:\Windows\Fonts
More Like This
- KB#456: How Do I Customize toolbars in PDF-XChange Editor?
- KB#282: Why won't the "Email Document" feature work in conjunction with Microsoft Outlook?
- KB#338: What are the MSI installation switch options for the PDF-XChange family of products?
- KB#447: How do I determine what version I should install/how can I retrieve my serial key?
- KB#428: How do I password protect a PDF file so that it cannot be edited?