Error has occurred!
- KB277
- Aug 14, 2025 09:18 AM
How do I create and use dynamic stamps in PDF-XChange Editor?
Question:
How do I create dynamic stamps in PDF-XChange Editor Plus?
Answer:
There are two methods available for the creation of dynamic stamps, as detailed below. Open the Category that interests you.
As of build 10.0.0.370, there is a "stamp creation helper" tool, which can be accessed through the stamps palette:
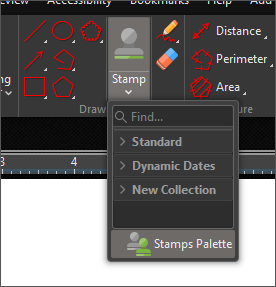
1. Click the Stamp Tool, then click Stamps Palette:
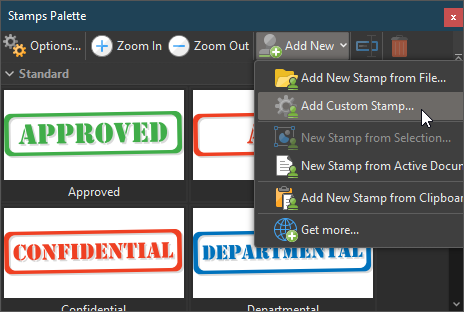
2. Click Add New, then click Add Custom Stamp:
3. Use the text tool to place the desired static text:
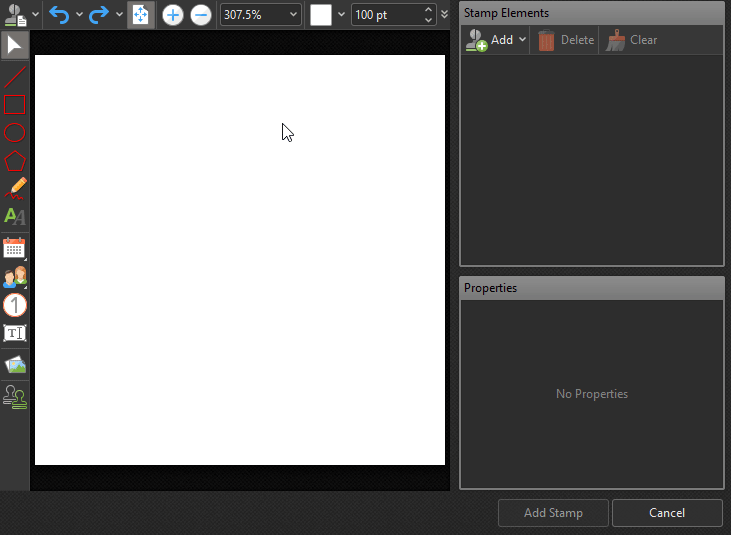
4. Select the Date Field tool, and the place it in the stamp as desired. Note that you can also right-click on the tool icon before placing a field in order to select the date format you wish to use. If your desired date format is not available, please see the next section of this article for more advanced customization.

5. Click Add Stamp to add the stamp to your stamps collection for subsequent use.
Please note that it is necessary to have PDF-XChange Editor Plus or PDF-XChange PRO in order to carry out the operation detailed below, as forms-editing functionality is required. JavaScript can be used to add dynamic elements to stamps in PDF-XChange Editor Plus.
This article assumes you have a working knowledge of Javascript. If you do not know Javascript, you can use resources like Code Academy to get your bearings. The PDF-XChange support team has limited JS knowledge, and cannot help you to build new scripts.
The first step is to create visual component of the stamp, which can be an image or a PDF document. General instructions on creating stamps is available in the section above, or in the article here.
Note: the steps below require that you have an existing stamp ready for modification.
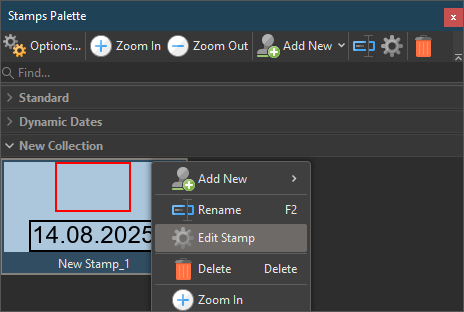
1. Once you have a static stamp in place, open the “Stamps palette” from the comment tab:
2. From the stamps palette Window right click on the custom stamp you wish to edit, and choose “Edit stamp”:
3. Add a form field to the stamp, or use the “select fields” tool, to select an existing one you wish to edit:
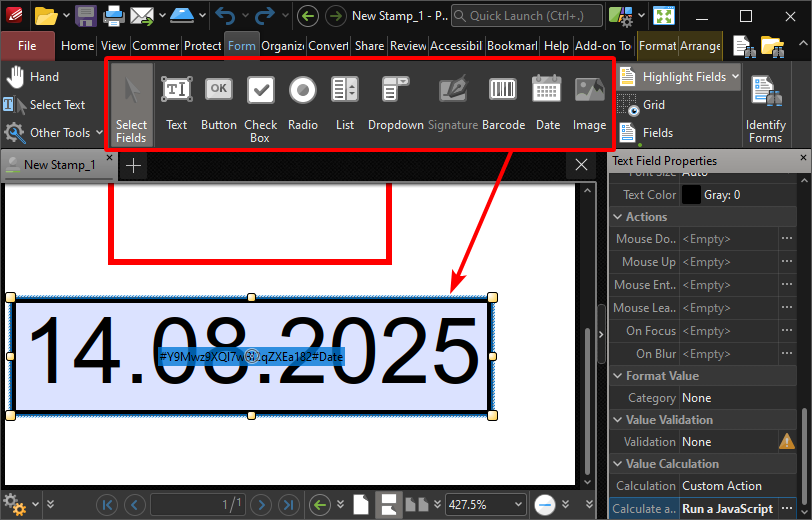
4. Add the desired Javascript to your form field to make it dynamic.
For example, the JavaScript below will automatically place the date and time at which the stamp was placed when included in the Value Calculation/Run a JavaScript property of that form field:
event.value = util.printd("dd.mm.yyyy", new Date());
Open the properties pane (Ctrl+`), then go to Value Calculation > Custom Action. Click the ellipsis [...] next to Run a JavaScript in order to open the Edit Action: "Run a JavaScript" dialog box, then enter the desired JavaScript:
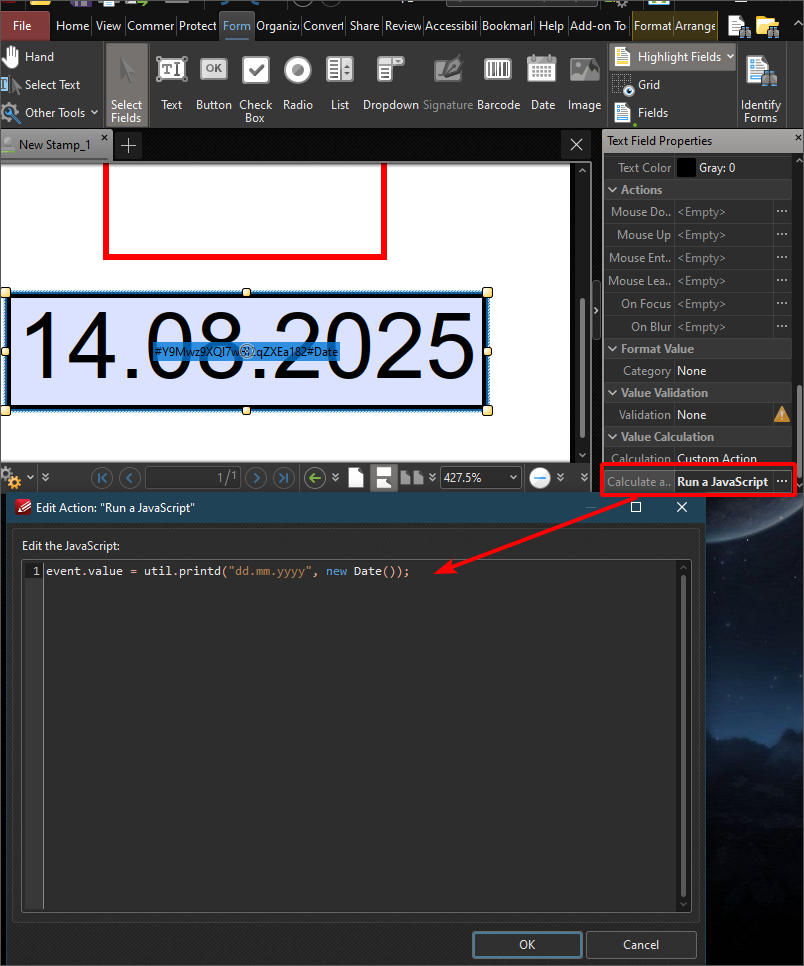
**Note: When a dynamic stamp is placed, it is added as a flat comment. The values of any form field are auto-evaluated when the stamp is placed. In the JavaScript example above, the date cannot be changed once the stamp is placed. Further information on working with PDFs and JavaScript is available here.
5. Save and close the file to record the changes.
In some cases, you may need to restart the PDF-XChange Editor after these changes, for your dynamic stamps to be fully functional.
Note that PDF-XChange provides free stamp collections for your use. You can view/download them here.
More Like This
- KB#456: How Do I Customize toolbars in PDF-XChange Editor?
- KB#282: Why won't the "Email Document" feature work in conjunction with Microsoft Outlook?
- KB#447: How do I determine what version I should install/how can I retrieve my serial key?
- KB#338: What are the MSI installation switch options for the PDF-XChange family of products?
- KB#195: What is the difference between Place Signature, Sign Document and Certify in PDF?